Sunday, March 11, 2012

Drums and Shakos Large Battle (Third Battle/March 11)

Today we had a great DSLB battle at the CMH Club meeting.  Tony, John and Matt joined me in one more play test and we had many others interested in trying it out.  I know that Matt and I are sold on the rules.  Again as I have mentioned they have very cool mechanics and we played our battle in just over three (3) hours.  And that was stopping to answer questions from players and onlookers alike.   
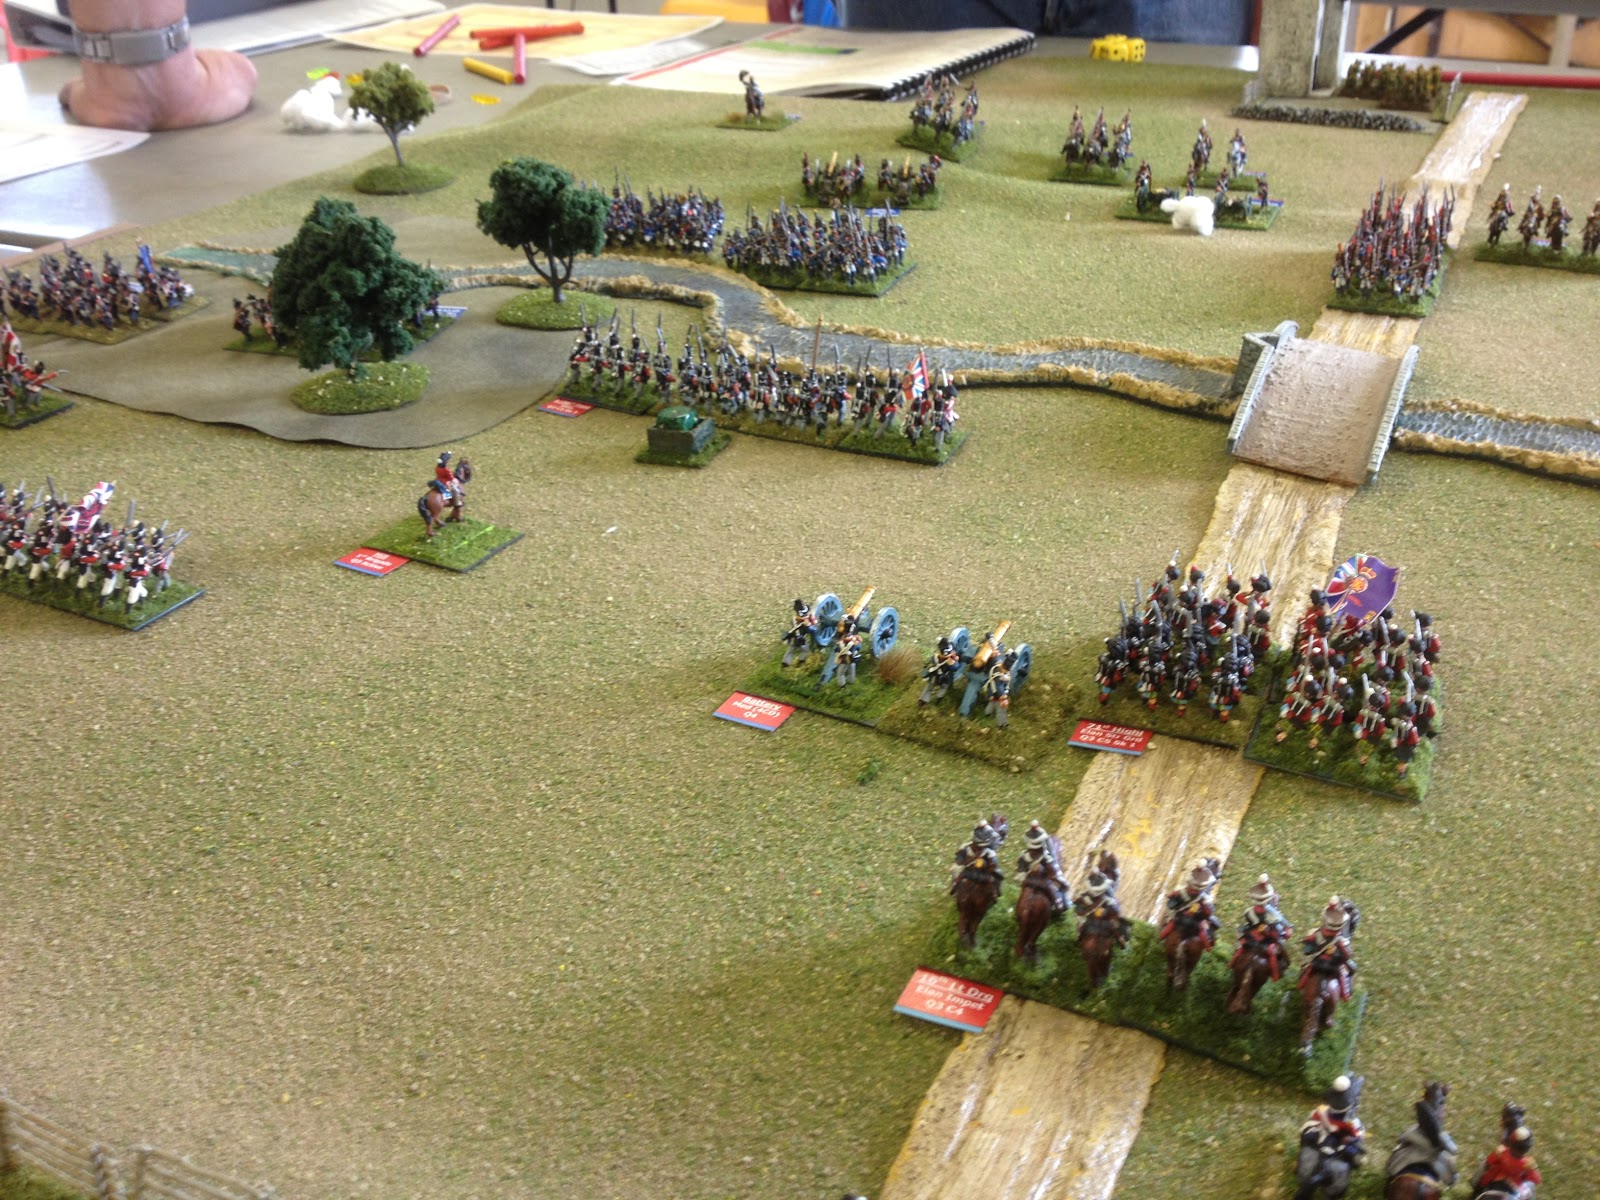
Matt's all out attack on our British left
We played this Peninsular Battle on a 4 x 4 foot board using the “Winning the Battle” Victory conditions.  
The British Division:
1st Brigade (Dan/Left Flank): 2 x Foot Bn, 1 x Foot (Vet/Elite), Rifle attached  (+2 SK to all), Medium Battery and a Commander. Shaken at 4.
2nd Brigade (Tony/Right Flank): 1 x Foot, 1 x Portuguese Line, Rifle attached (+2 Sk to all), 1 x Regt. Lt. Dragoon (Elan/Impetuous) and commander. Shaken at 3.
3rd Brigade (Tony/Right Flank): 1 x Rifle (Light), 1 x Caçadores (Light), 1 x Light Foot (Elan/Light), Light Battery and commander. Shaken at 4.
Reserves (Dan/Center):  1 x Light Dragoons (Elan/Impetuous), 1 x Highlanders (Elan/Elite/Strong), Light Horse Battery and the CnC.  Shaken at 3
Division Breakpoint: 7
The French Division:
1st Brigade (Matt/Right Flank): 2 x Light Infantry (Elan/Light), 2 x Line (Vet/Determined), Medium Battery and a commander.  Shaken at 5.
2nd Brigade (John/Left Flank): 2 x Line (Vet/Determined), 1 x Line, 1 x Bavarian (Unpredictable), Medium Battery and a commander. Shaken at 5
Reserves (Matt/Center): 1 x Grenadiers (Determined), 2 x Dragoons, 1 x Hussars, Medium Battery and CnC.  Shaken at 5
Division Breakpoint: 7
Highlanders advancing!
Tony and I took the British/Portuguese with Matt and John taking the French.  Since this was going to be a French attack for this scenario it was determined that the French would have the initiative so start.  
Tony's Light British Brigade across the stream.
First of all, John nor Tony have played DSLB yet so it was new to them. It didn’t take long for Tony to pick it up because of some similarities to SDS Skirmish.  Then soon after John was right in there holding his flank.  
Matt attaching the Grenadiers to the French Left
I played opposite Matt and his French Brigade.  Knowing Matt’s style I knew he was going to be on me as quickly as he could.  He lead with his Light Infantry across the shallow stream and through the forest.  I started out my Line units to the edge of the tree line.  Both Matt and I has some stalls with out Brigades so we didn’t get stuck in as quickly as we thought.  I was able to repel one of his Lights and eventually destroy it but being a little too cautious I elected to not pursue and maintain my flank.  More hard fighting between our forces also lead to one of my Foot Battalions to also be destroyed.  This was another fight to get across the stream but one his Veteran Battalions stopped me in my tracks and destroyed it. 
Tony's British/Portuguese Brigades pushing on the right
Matt also controlled the Reserve in the center and right away started attaching the Grenadiers to John’s flank.  Both Matt and John saw the unpredictable Bavarians were going to end up in a key position because of what was happening to John’s Brigade on his far left.  So Matt brought up the guns and started pounding my Highlanders that I had coming up from our Reserves to stop his Grenadiers from using the bridge.  
Highlanders squaring off with the French Grenadiers
So back over to Tony on our British Right Flank.  He started pressing with his Light Brigade.  The Rifles crossed the stream and pressed on one of Johns French Line Battalions. The Rifles were attacked but the French had the tables turned and the Rifles counter charged and drove them out of the Tree line.  The Rifles continued on and eventually destroyed them on an approach.  We penetrated into the French Zone 1 with infantry in command.  They also did the same to me on the other flank.  As you know these points are temporary if you can destroy or push them out of the zone.  
The destruction of the Highlanders.  Damn Grenadiers!
In response to Tony’s attack John actually had a battery in the right position to fend off the breakthrough.  The Rifles were already getting worn down with Disorder and the Battery eventually finished him off. 
Tony's Light British/Portuguese Brigade across the stream.
So at this point the points were close.  The British Division Breakpoint was set at 7.  So they had two units destroyed which resulted in two points with no shaken Brigades.  Then at this time we penetrated Zone 1 with infantry in command so their Division Break total was only at 4.  
John's Battery taking on the Rifles on his flank!
The French however was two destroyed for 3 points, one of those were Elite, and because of our low Brigade Shaken levels, we also had 2 points for the two Shaken Brigades.  So that totals 5 points.  

Good view of the entire battle.
The battle raged on.  I wasn’t thinking when I moved my Highlanders to the left of the road and then the French Grenadiers moved off the road to the stream edge ready to punch into a gap in our line. My Highlanders took two DIS from Matt’s Batteries before I was able to move them to into approach on the Grenadiers.  I didn’t really want to engage but it was too late.  Those tough Grenadiers destroyed my “men in skirts” which gave us 2 points which also took us to our Division Breakpoint.  
So lessons learned.  Remove those disorder whenever you can!  We really liked the enemy penetration points.  It makes you think about breakthroughs and trying to stop them or fill in the gaps.  The reaction on fails keeps everyone involved and allows the defender to perform tactical maneuvers to flanking enemy units.  The approach phase is well thought out and we think it is really a cool feature and has a sense of realism to the battle.  Too many times I have played in battles where an enemy is barely hanging on but still find a way to make contact and fight.  In these rules when an enemy has the momentum I believe that these beat up units would definitely find a way to get out of the way.  And shame on the commander who keeps a DIS 2 or 3 unit on the front line anyway.  
So we are already going to schedule some more battles along with our SDS Skirmish Campaign.  

Sunday, March 4, 2012

Drums and Shakos Large Battle (Second Battle)

Saturday evening I made it in time to join my colleagues in another DSLB battle at the Colorado Springs Gamers Association (CSGA) club meeting.  Bernie and Lamont were kind enough to fit me in and put me in command of the British Right Flank and Reserve Brigades.
Bernie and Lamont working it out.
First of all we had a blast.  I have to apologize to them for my interrupting questions because that same morning Matt and I played for our first time and I had questions about many of the rules.  Bernie and Lamont play in 25mm and those figures looked fantastic.  They were based for Napoleon's Battles but it was no problem for a good DSLB battle.
British getting it on!
As I mentioned in the last blog I learned so much from both battles.  In this battle they used all of the troop attributes and have created some pretty nice spreadsheets that are used to build your forces statistics, labels, etc.  I really liked the attributes of Strong, Elan, etc., all familiar to me from SDS.
At this point we still control the slopes.
Some of the rules that became clear were things like:  Using the Combat Dice table and NOT using the Combat (C) value for the number of combat dice.  Sure it is stated in the rules but that doesn't mean that a man my age saw it.  haha.  Another rule was once an Elan unit gets a Dis which they cannot recover they cease being élan and other special rules around fighting squares with infantry or cavalry, etc.  Matt and I had an old Quick Reference sheet and some of the typos were corrected in this new one.  Bernie and Lamont had the new one and made things clearer for me.
Aggressively advancing the Rifles
The very important Proximity rule now makes sense.  It is very important to keep your spacings.  There are some good reasons that make perfect sense for the Proximity.  One of them being that cramming units together could force multiple targets, which would be an advantage for a defender.  Another is that it helps when you form from column to line.  In other rule sets we are crammed in there and are forced to slide other units to make room for a battalion or regiment to form a line.  We like this rule.
On the Russian Flank it was a swirl of action and bad rolls
There were other situations that came up which took Bernie, Lamont and I just a few moments to look it up in the rules and come up with a ruling.  It was the same with Matt.  Matt and I have played wargames together for many years.  Our motto is to never let rules slow down your game.  Don't argue, just keep it moving and we will figure it out later if it's that complicated.  Bernie and Lamont were no different, we figured it out and kept on rolling.
At the top there were some pesky Dragoon waiting to pounce!
So I stuck a few action pictures of Bernie and Lamont's beautiful figures,  It was a great battle but I had a deadline of 10pm and had an hour drive back to Denver to get home so we called it.  At the end we took some time to go over the rules and discussed the scheduling of the next battle.
A swirling battle of Cossacks and other Russian Cavalry
So thanks Bernie and Lamont for a very good battle.  I always enjoy coming down to Colorado Springs and seeing all of you.  I should make it next week.

Dan


Drums and Shakos Large Battle (First Battle)

Yesterday I had my first battle of Drums and Shakos Large Battle (DSLB).  Matt and I usually pick up a new set of rules and get a couple of play tests completed which would allow us to introduce others to something different.  These are the rules written by Sergio Laliscia who also wrote Song of Drums and Shakos (SDS) Skirmish.  

I wasn't able to read the rules before our battle due so my travel schedule to the brunt of running the battle fell on Matt.  But like Sergio's rules, they are fast to learn but I have to say that if you haven't tried this set you will want to give it a try.  It steers away from our traditional rule sets a bit and I really think you will like the feel of the system.  

Of course Matt and I did a few things wrong but after playing our first battle and then going home to review the rules we are anxious to throw down our next battle next week.  In addition, I was also able to join Lamont and Bernie at the CSGA Saturday night meeting.  Yup, I got to play in two games in the same day at two locations and I can say that I have learned a lot!


French moving to defend the hill.
Matt had setup a battle with forces pretty much equal without all of the special rules in order for us to get the mechanics down.  Here  you can see the French with a Brigade around the hill with the Reserves coming up in a long column from the rear.  We had another Brigade on the French Right.

This is a 15mm battle and we may have had too much space but it worked to our advantage allowing us to get the Group Move mechanism figured out before we started getting into Approach and Combat.

Reserve Column
The Prussians were on the attack and started in the Village on their left.  The reserves contained the Prussian Grenadiers but we did have a mix of Conscript or 2nd rate infantry which have an interesting activation method.  

Prussian moving through the Village


As we do in SDS we use the measurement sticks for Very Short, Short, Medium and Long ranges.

Matt moving his Prussians forward

Both the French and Prussians had conscripts so in order to activate them you roll an Average Die with the activation dice.  The average die provides the Quality at that particular time of rolling.  So it can change on you during the battle.  Pretty clever mechanism.

Bavarian 2nd rate troops

During the battle your units will start to receive DIS or disorder hits.  When any unit hits 4 it is eliminated.  But as you accumulate them it effects your approach and combat.

Below you will see a Cavalry unit attempting to attack.  First they move into short range and will run through the Approach sequence.  It is possible that the attack can be checked or they could be counter charged depending on the approach rolls.  Once you successfully make an approach then you move into contact and then go through the combat procedure.  At first it seems little strange but once you get the hang of it you will find it pretty easy.

Moving into Approach range

Combat is much the same as Approach and the results are many.  Both getting disorder, defender getting a couple of disorders, retreat, breakthrough, etc.  Everything you would expect in a good set of Napoleonic rules.

Combat with both taking Disorder

Besides the Approach and Combat just activating is pretty cool.  So its your sides turn.  You will have a chance to move and fight all of your brigades.  Here is the catch.  Like in SDS if you roll any failures your opponent will have a chance to move a battalion as a reaction.  For example, I roll for my first brigade commander.  I roll three dice and I have one fail.  That means my opponent can move one unit using that one failed die.  If I failed with two die its gets worse.  Then my opponent can use two dice for any unit he wants to react with.  Plus I get one action and then I have to move to the next brigade because of the double failure.  A triple failure is of course much worse.

More maneuvering

There are many "chrome" features in DSLB that we did not use.  Like, units being Strong, Light, Elan, Determined, etc., sound familiar SDS players?  You will find a few familiar mechanisms from SDS but it is really a different Brigade feel.  Oh, and units are provided Skirmish levels.  When in approach you compare your SK rating, either 1, 2 or 3 against your opponents and if greater or worse it will give you or your opponent a extra advantage which I will not explain here.

So again this was not meant to get into a complete rules discussion or to be used as guide.  Matt and I found we did a few things wrong and will play test this again until we get it right.  So thanks to Matt for throwing it down. As we say, "you can't figure it out until you throw it down and play it."  So far we think its a fine set of rules and look forward to more upcoming battles.

Nice looking Nappy Battle
Thanks Matt for throwing it down!
Dan