
So I thought, okay Resin cast it should be easy. Nope. The resin casting was not as sharp as I would have liked. There was some warping at the stern wall, the upper deck detail was not cast too well, etc. Small items like that but you can see the model is very beautiful overall.
So after sanding and cutting in various places, replacing the paddle assembly with my own version I think it came out pretty good and my my friend Jon will be pleased when he sees it at Historicon in a couple of weeks.
I didn't get a chance to annotate the pictures like I usually do. Once I get back stateside I will work on the pictures showing the modifications and will re-post in case you are interested.
Enjoy the pictures. As soon as I get home this weekend its time to pack and hit the road for Lancaster on Monday.
Come by and and say hello at my dealer table I am sharing with Bud's Blast Markers! (https://www.budsblastmarkers.com/)
Last Stand Dan
(https://www.laststanddan.com/)
 |
| Sorry for the scribble, asking Jon if he liked this color scheme. |
 |
| Priming the resin |
 |
| You will see in the pictures below. I used a Yellow Oak color with some minwax stain. |
 |
| This Tension Wire (String) was to sit on top of these metal struts/beams. I added eyelets in lieu of just gluing them to the struts. |
 |
| You can see the rough casting on the edge of upper deck. I ended up covering this with wood trim shown below. |
 |
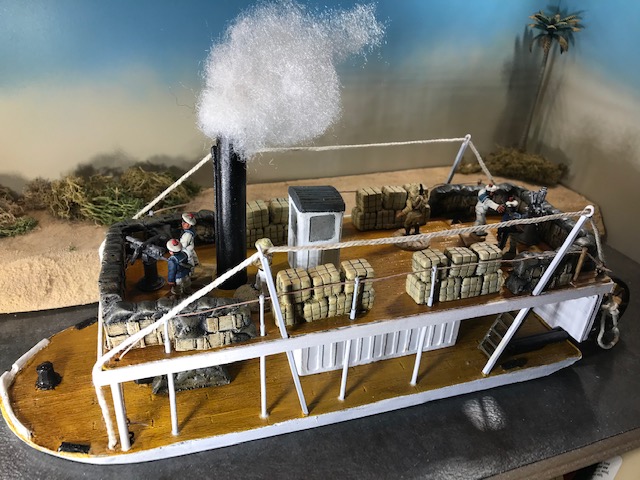
| These vertical struts are very soft metal that protrude through the upper deck. They have small holes in them to run a wire safety line through. I replaced that wire with scale rope. |
 |
| The model comes with a lot of sandbags and cotton bales. Painted up a few for this model and glued them to upper deck. |


 |
| That back wall at the paddle assembly was the toughest part of the model. It was slightly warped so after a lot of sanding I got it as close as I could. To cover a small gap at the connection to upper deck I used some wood to cover it. |
 |
| Just a view of the bow. Again very nice model. You get a good view of the upper deck trim piece. I modeled it for pictures with a Pulp figures deck gun, Askari French Naval Gun crews and a Reviersco Gatling gun. |
 |
| If you read the instructions (yes I did!) it mentions that the forward tension wire actually went through the deck. They don't tell you to do this but I went ahead and drilled into the lower deck to glue the "wire" into the deck forward of that vertical strut. |
 |
| It said to secure that "wire" to the paddle piston rod. I cleaned this up. Made a smaller tighter bowline, turned the knot to the inside and glued in place. You might also notice that I mounted a trim piece over that detail mentioned above. I thought it made it look cleaner and also strengthened those 4 tension wire struts in place along the sides. |
 |
| If you look close upper deck aft at the safety line I had to add a wood strut. There was nowhere to support the line after threading through the 4 vertical metal struts. So just took some basswood, drilled a hole and glued in place. Worked out great. I also replace the soft metal paddle assembly with an LSD version using stained basswood for the paddles and modified plastic wagon wheels from Pegasus Hobbies. |
4 comments:
Slightly better than the models I make :)
A fine looking ship !
Hi Rob, tell me about your models.
I do various Pulp scenarios involving card models models based on my article Tealight ironclads in Miniature Wargames 366 (and originally designed as craft projects for teaching). Lately I,ve been carving various 1/56th scale aicraft to provide transport. See my blog https://easterngarrison.blogspot.com/2019/06/a-sort-of-balsa-review.html for the balsa models, some variations of the Tealight ironclads are at https://easterngarrison.blogspot.com/2016/06/uss-arkham.html
Post a Comment